Wednesday, January 2, 2013


Rugelach


This season has been a little hectic. Hard to find my feet the last 6 weeks, so not a lot of baking, just a lot of getting up, going through the paces, rinse and repeat. I'd forgotten the comfort of baking. But if there is comfort in baking, there is even more comfort in cream cheese and baking and so Rugelach seemed called for. Our homestay student, Bonnie, was very impressed with these as she'd never seen Rugelach before, and I've got to say they look very pretty (and my permanent kids were pretty keen as well). As they are so tiny you can scarf down quite a lot while pretending you're being very good for only eating very-small-pastries! Please don't forget to egg-wash them. I forgot with the middle batch and they just look very utilitarian, which is the last thing you want with such lovely delicate little things.

Cream Cheese Dough

1 cup of salted butter, at room temperature
one tub of cream cheese (about 250 grams)
2 cups of flour

Fillings

You can vary the fillings, anything from poppy seed to cinnamon and walnuts to raspberry jam. Inspired by Deb Perelman of Smitten Kitchen, I've got for a jam-chocolate-nut combo here (though for Hamantaschen, which is pretty much the same dough, I prefer apricot jam).

2/3 cup raspberry jam
1/2 cup sugar
1 1/2 teaspoons cinnamon
sprinkling of chopped walnuts
about one chocolate chip per tiny triangle, or a small handful (depending on your hands! I've got small hands, so if you've got great big mits, then half a handful).

Beat the butter and cream cheese until thoroughly combined. Add the flour until just blended. Put the dough onto a big piece of cling-film and pat into 2 flat wheel shapes and refrigerate. Don't think you can skip refrigeration because the dough is impossible to work with at room temperature. Wrap the dough up tight and leave in the fridge for at least two hours.

Assembling the Rugelach

Preheat your oven to 350. Warm your jam in a little saucepan as it's easier to spread this way. Now mix the cinnamon sugar together and get out your walnuts (pre-chopped into fairly fine pieces) and chocolate chips. Put parchment paper on your cookie sheets because the jam will stick like a bugger if you don't and you will bitterly regret it. Regret should not be associate with Rugelach!

Roll your first wheel out until fairly thin. Spread with the jam, sprinkle generously with the cinnamon sugar (remember, there's no sugar in the dough), press some walnuts in and then your chocolate chips. Divide the dough (I find a pizza wheel works best but if you don't have one then use a knife) into 16 sections. (Roll the wheel across to divide into two, then another direction to divide it into four sections, now begin dividing those sections until you have 16). Roll each section from the outside in until you have an almost croissant shaped rugelach (see photo). *Paint the rugelach with a wash of one egg yolk mixed with a scant teaspoon of water* Pop the cookies into the oven for about 20 minutes.

Once they are lovely and dark-golden take them out and let cool a few minutes as the jam is piping hot and will burn.

Sunday, May 13, 2012

Tweed Ride 2012

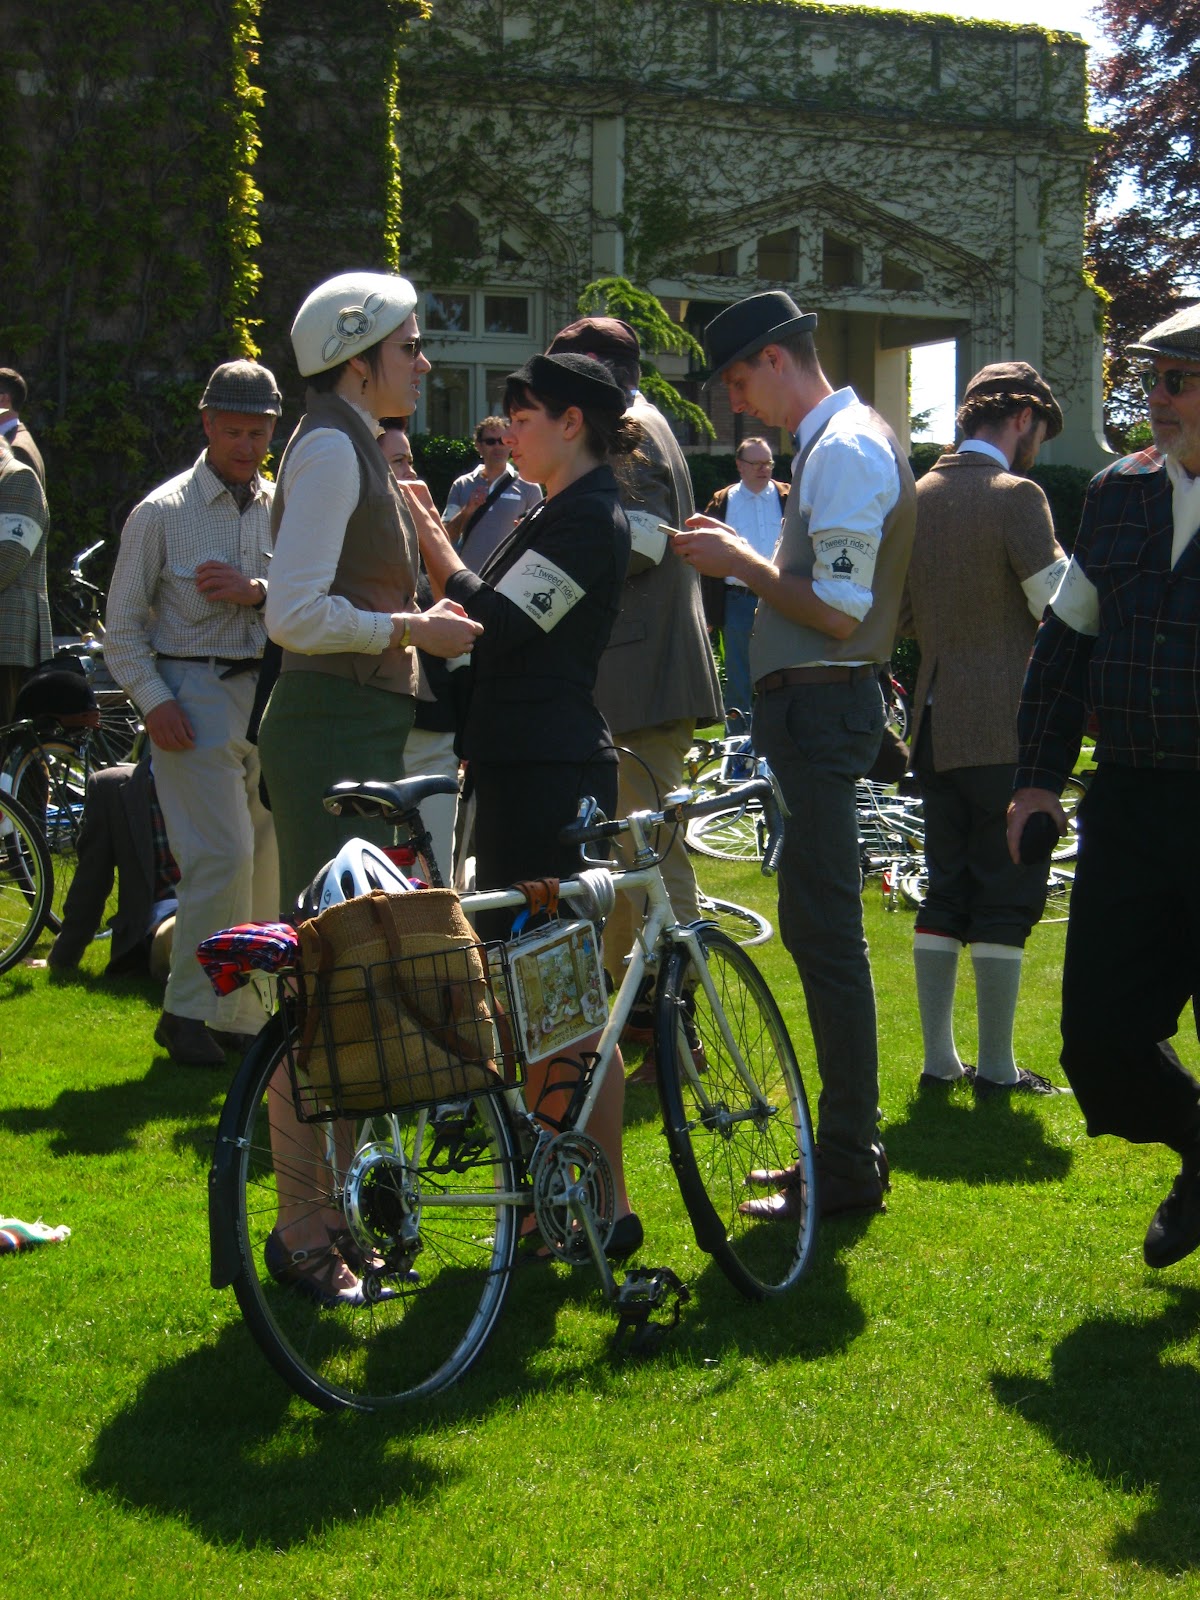
We had the best day yesterday! Gorgeous weather, a day with nothing to do but join some 300 other people all dressed in tweed to ride about the environs and end up drinking tea and eating cucumber and salmon sandwiches on the lawns of the castle. (We ended there as taking my kid to the pub where others ended is not likely). Finally the thousands of hours spent watching period dramas has paid off and I get to make a very civilised spectacle of myself! 

I had only vaguely looked at the route and so kept thinking "surely we turn here for the quickest way to the next stop". Took me ages to realise it was not about the destination, but about the journey. As in life. I have plans for next year involving refurbishing my 1963 CCM, buying a wool tie and tortoiseshell sunglasses. Am listening to Glenn Miller to sustain being In the Mood!


Monday, April 30, 2012

Lemon Yogurt Cake and Lemon Sorbet

It's still so chilly out: late, late spring. On the upside it means that when the lilacs do finally bloom there will be proper warming sun to bring out the scent. On the downside I'm bloody freezing and tired of wearing coats in the house to stay warm. Pretending it's summer by bringing out the lemons helps a little. We made fantastic lemon ice cream on the weekend and then Lemon Yogurt Cake. I've seen loads of recipes for Yogurt Cake but wasn't too intrigued till I saw Darina Allen's Yogurt Cake with Lemon. I've played around with it a little, taken out the lemon curd, substituted my own icing, but it's very, very nice. Really the nicest Lemon Cake I've had, and trumps the one with ground almonds as kids can take this one to a nut-free school.

The Lemon Sorbet which follows is considerably more lemony that the original recipe it's based on. If you are not as much of a lemon-freak as we are then just scale back a lemon or so.

Lemon Yogurt Cake

4 eggs
1 cup yogurt, no added pectin
1 cup sugar
1/2 teaspoon vanilla
grated peel of 3 lemons
1/2 cup vegetable oil
1 1/2 cups flour
1 teaspoon baking powder
1/4 teaspoon salt


Beat the eggs, then add yogurt, sugar, lemon zest and vanilla. Beat well then add blended dry ingredients. Once thoroughly incorporated add the oil. Pour into a buttered and lightly sugared loaf pan and bake for just over an hour. Keep an eye on it: as always my mad oven likes to under-bake centres while burning edges. If you're baking with a 1947 General Motors stove (yes, you read that right, GM not GE), then you may need to tent it.

Once the cake is done take out and cool. While cooling make the icing. Squeeze your original 3 lemons and probably another 2 or so into a saucepan. Add 1/2 cup icing sugar and boil for half a minute. Now make holes all over your lemony cake with a fork and pour the icing in. The yogurt's made it moist the icing poured into the cake just heightens the meltiness of it. Serve just as it is. Very nice warm but really very nice the next day too. I doubt it's going to last long, but that may be my terrible greed talking.

Lemon Sorbet (or just about the most refreshing thing you've ever tasted: utterly thirst-quenching on a hot day. Which was not this weekend, but somehow we coped!)

zest of 4 -5 lemons
1 1/2 cups sugar
2 3/4 cups water
1 cup lemon juice (takes about 6 or 7 lemons)

Melt the sugar in half the water then put in the fridge for at least 4 hours. If it's not cool enough then the damn ice cream maker will refuse to cooperate and you have to start refreezing the storage unit all over again. Get the sugar water Coooooold. Add the lemon juice to the sugar water before putting it in the fridge ensures a good product as then the juice is also cool. Once it's seriously cold you take out your ice cream maker, add your lemon-sugar-syrup and the rest of the water, which - needless to say - is as cold as it can be. Put into the ice cream maker, turn on and voila (after a suitable intermission). Best darn lemon sorbet ever!

Sunday, April 15, 2012

Lovely Scones


These scones are so lovely: for breakfast, afternoon tea, without sugar but a bit of cheese added in at lunch. If you don't do well with dairy you can substitute keffir as it is for some people more digestible than milk and cream. Heating it does kill all the good bacteria but still worth while as keffir seems to give a lovely rise. Remember with scones (and muffins) you don't want to overmix as it makes the product a little tough. Just blend to achieve a melty crumb.

Here's the basic scone recipe: to this you can add keffir or yogurt and milk in place of milk or cream; and/or 2 teaspoons grated orange plus 1/3 cup marmalade; 2 teaspoons ground ginger and 1/2 cup blueberries (frozen is fine); 1/2 cup raspberries; 1 mashed banana and a handful of chocolate chips (if doing banana chocolate scones reduce the milk by about a quarter cup then add back in by drops if necessary); 1/2 cup raisins and one grated lemon. We eat them a few times a month for breakfast: the chocolate banana ones are the favourites with the kids, I lean to the marmalade ones myself. Of course you want to serve them with lots of butter!

Scones

2 1/2 cups flour
4 1/2 teaspoons baking powder
1/4 cup sugar
1/3 cup butter or margarine
1 1/4 cups milk or combination milk and cream or keffir or keffir and yogurt.

Preheat oven to 375 degrees. Blend dry ingredients and rub the butter in. If you're adding berries or chocolate chips or raisins add them to the dry. Make a well in the centre of the flour mixture. Then add the milk. Mix with a spoon till blended. If making the banana scones add the banana goop to the milk and don't forget to reduce the milk till you see the consistency of the batter.

Saturday, April 14, 2012

Chocolate Bark


Chocolate Toffee Matzah might be the best Passover thing but Chocolate Bark is the best thing full stop! It is crazy easy and portable and keeps well (eat within a week: not that there's a chance of it lasting that long) and can be taken to school. Plus it is flour free.

4 ounces dark chocolate, best quality
handful of pumpkin seeds, sunflower seeds, dried cherries or dried apricots

Melt the chocolate in a double boiler. When it's fully melted stir in most of your dried fruit and nuts. Then pour slowly onto a piece of parchment paper laid on a cookie sheet. Scatter the remaining fruit and nuts on top. If your kids are fussy content yourself with hiding the fruit and nuts inside the chocolate (looks prettier on top but I found all the visible dried cherries picked out). Put in the fridge to harden for half an hour. Boy will this make you popular!

Tuesday, April 10, 2012

Chocolate Toffee Matzah


Oh, this is the best Passover thing. Makes kids adore you, crowds follow you, matzah disappear like water in the Red Sea. Plus it's terribly easy to put together, which is a bonus!

Chocolate Toffee Matzah

4 sheets matzah
1 cup butter
1 cup brown sugar
1 cup chocolate chips

Slowly melt the butter and when melted introduce the brown sugar. Cook, stirring, for 2-3 minutes. When it's done put your matzahs on a cookie sheet (this must be lined with parchment or a silpat mat). Carefully pour the toffee over and pop it in the oven at 350 degrees for about 10 minutes, till it bubbles. Take the matzahs out and immediately scatter the chocolate chips over the top. Leave a few minutes to melt then spread them carefully over the matzahs. Let cool and pass around.

Passover goodies!


Every year something different about Pesach strikes me as challenging (in the food arena: vanquishing my inner Pharaoh is always a climb up the Pyramids on a hot day). This year I think I've conquered sweeties, largely through the judicious use of chocolate, ice cream and quinoa - though not all at the same time! Today the kids went to school with chocolate toffee matza and came home to blueberry-raspberry quinoa muffins. For our Thai homestay's birthday tonight I think I'm feeling lazy and will mix up our Lieber's sponge cake and put some jam in the middle. In the meantime here's some quinoa muffins (they do use baking soda which, while it might contravene the spirit does not contravene the law of Pesach).
Berry Muffins for Passover

2 cups quinoa flour
2 eggs
1/4 teaspoon salt
1 1/2 teaspoons baking soda
1 teaspoon cinnamon
3 tablespoons butter
1 medium banana, smushed up
3/4 cup yogurt
1/2 cup milk
1 cup berries
1/2 cup maple syrup

Preheat the oven to 350. Butter muffins tins and sprinkle in a pinch of sugar to each muffiny section (this keeps them from sticking). Blend the dry ingredients and add the berries to the dry. Melt the butter and then stir in the yogurt and milk (or use just over 1 cup of keffir). Add the eggs to the moist mix, then the maple syrup and the bananas and then add the moist to the dry. Stir till just blended. Bake for about 25 minutes. Let cool in the pan a little (I use silicon then invert and push gently from the bottom to encourage them to slip out). Serve with butter or margarine.


Wednesday, March 28, 2012

Chocolate Cinnamon Squidgers


I asked Max what his favourite baked treat of mine was. "Ooooh. Chocolate cinnamon birthday cake! No, maybe your lemon-honey cookies! Um, wait, that chocolate banana cake. Or maybe the Chocolate Cinnamon Cookies? Nope, too hard, I can't pick one". Well, he can't pick one, but here's one of his picks!

Chocolate Cinnamon Squidgers

1/2 cup butter
1 cup brown sugar (not packed)
1 large egg (free range please)
4 ounces melted semi-sweet chocolate
1/4 cup golden syrup (or light corn syrup)
1 3/4 cups white flour
2 teaspoons baking soda
1 teaspoons cinnamon
handful of dark chocolate chips or chunks
sprinkling of white sugar*

Melt the chocolate in a double boiler. While this is going on blend the brown sugar with the butter. Once thorougly blended, add the egg and stir in. Now add your melted chocolate (some of which will adher to the side of the saucepan: this is to enable you to wipe it off with your finger and taste for quality assurance purposes) and golden syrup. Blend dry ingredients and add to the moist. Stir thoroughly to combine and then toss in chocolate chips or chunks. Shape the cookies to the size you like and dust with sugar. Bake for 12 minutes at 350 degrees. Remove from the oven and let cool a minute or two before transferring to your wire rack. If you're rushing around, trying to get kids ready for school the cookies will take advantage of this and fall apart if you try to move them too soon. If you're trying to get ready for work on top of this they will chuckle evilly while falling through the racks. So go away, do something else productive and reappear in a couple of minutes to slide them over.

* note on sugar: I have recently discovered that on the coast our white sugar is cane sugar. Cane sugar, unlike beet sugar, is for some mad reason processed using animal bones to bleach it. Or something. At any rate, former beings are used in the processing of sugar in Vancouver. Ewwwww! So now I'm using organic sugar (not processed this way) and brown sugar (and hoping that's not processed this way) and hoping this weirdness abates at some point. Being a vegetarian (not vegan) baker is tougher than it looks! Not mountain-climbing tough, for sure, but a little salt with the sweet. Having said that I'm appreciating Max moving me over to deeper thinking about my almost 3 decades of veggie habits. We're also rennet-free now and gelatin free with vitamins (never thought about that one: again, ewwww!).


Tuesday, March 13, 2012

Vietnamese dinner for 3


I'm going off topic, branching out to savouries, carried away by the extreme moreishness of tonight's dinner. We had Japanese food the other night for dinner and I had tempura batter left over: googled it and some internet people claim the Vietnamese eat tempura. Well, if it's on the internet it must be true, right? What to eat when you take out the meat? Eat this, baby, eat this!

Jasmine rice: you can figure this out by yourselves. Just make sure you wash, wash, wash the rice first. If you don't have jasmine rice, make plain old white, I won't tell anyone. I threw in a few snowpeas once I figured the rice was done and left the lid on for them to steam.

Peanut Sauce:
this is crazy-good. It's great that you might have lots left over, put it on steamed veg, eat it with crudites, mmmm.

2 cloves garlic
2 tbsp cilantro
2 tbsp peanut butter
2 tbsp lime juice
1 tbsp soya sauce
1 tbsp rice vinegar
1 tbsp chopped ginger
1 1/2 tsp sugar
1 tsp sesame oil
1/2 vegetable oil

Whiz all this up in your whizzer of choice. (I use a tiny counter-top whizzing thing and it does the job brilliantly).

Tempura dipping sauce:

1/3 cup mirin
1/3 cup soya

Boil very briefly in a saucepan and pour in a little bowl for dipping.

Vietnamese Tofu:

1 package of firm tofu (or medium firm, throw caution to the wind!)
2 cloves of garlic
5 tablespoons soya sauce
1/2 cup vegetable oil
1 teaspoon sesame oil
1 bulb of lemongrass, fresh as you can find (should feel somewhat pliable)

Take the tofu out of the container and wrap gently in a piece of paper towel. When it's dry, cut into long, thinnish strips.

While the tofu's drying a little, chop up the bottom of the lemongrass, the bulb part and a bit of the green. You'll have to take off at least one of the outer layers of the lemongrass unless it's super, big-city fresh. Chop it up pretty finely and put it in a mortar. Add the chopped garlic and grind, grind, grind. Or throw it in a machine if you like making noise and washing up stuff. Put it in a bowl or pan and add the other ingredients. Add the tofu and let marinate for about an hour. When it's good and soaked, fry it up. There's plenty of oil in the marinade so no need to add more. Turn that heat up high, slap a lid on and turn the slice over when they are browned. Serve with all the nice goo from the pan (which will mostly have cooked away).

Tempura:

1 egg
2 cups of water
2 cups of flour

Mix egg with water, then watery egg with flour. Heat vegetable oil really high (then I usually turn it down just a smidge, but keep an eye on your tempura and judge accordingly). When the oil's nice and hot, dip your vegetables (we always have sweet potatoes or yams, carrots, broccoli, peppers, and onions are also nice) in the batter. Carefully (this stuff is Hoooot) drop into the oil. Stand there watching it a while. Think your thoughts, don't take any phone calls. When it's browning a tad, turn it over, cook a wee bit more. Take it out, put some more in. Let the stuff that's waiting on a paper towel cool down a bit then give it a test bite. Mmmmm.


Yummy, gooey, crunchy, soft contraband


As part of my saving money and decluttering drive I've realised I need to keep better track of the groceries we've already got on hand (so back you go, redundant package of black sesame seeds). We were needing something yummy, gooey, crunchy and soft and I unearthed a package of sliced pecans I'd semi-forgotten about. Mmmmm, these could become pecan squares I thought to myself (I was feeling a bit flaked out, if you'll pardon the pun, from the recent pie-making so didn't go to chocolate pie-crust pecan pie, which, of course, was my first mental stop on the pecan goody train). These turned out Gorgeous, just Gorgeous!! As I slipped them into the oven I realised Max could not take them to school as the school is nut-free. Ah well, better make him some Chocolate Spice Cookies then. Fortunately we were sent one heck of a wind storm which knocked out power to the school, giving us a chance to eat Every Last Pecan Square and me a chance to make the Chocolate Spice Cookies.

Pecan Squares

For the Shortbread base:
3/4 cup of butter, softened*
1/2 cup brown sugar (not packed)
2 cups white flour
scattering of chocolate chips (optional!)

For the gooey pecan top:
1/2 cup butter
1 cup brown sugar (not packed)
1/3 cup honey
2 1/2 cups (roughly) pecans
2 tbs cream (ran out of cream, used milk, seemed fine to me)

Making the shortbread: blend the butter and sugar thoroughly, then add the flour till combined. Put the dough in a lightly greased 8 by 8 square pan (or thereabouts) and press. Bake the base until firm, about 15-20 minutes at 350 degrees, until firm and lightly browned. When it comes out, if you like, scatter the chocolate chips about straightaway.

Making the pecan topping: While the shortbread base is cooking, chop the pecans if not already chopped (though why you'd buy whole pecans for a recipe indicating chopped is beyond me: ergonomics, bakers, ergonomics!). Melt the butter slowly (burned butter seldom being a good idea) and stir in the brown sugar, honey and cream. Remember how hot this is and do not touch it, even if it does look really good. Simmer for a minute, stirring a little. Stir in the pecans, Bob's your uncle. Pour the pecan ooze over the base and pop it back in the oven. Given that the base is already cooked it's a good idea to put it on a cookie sheet so that the base does not overcook. Maybe tent the top with tin foil so that it doesn't over-brown. cook till most of the filling is bubbling and then whip it out. Let it cook, significantly, and then ... ooooooh :)

* recipes almost always specify unsalted butter, but it costs more and in my possible ignorance I figure that if recipes asking for unsalted then always ask you to put salt in the recipe, well, I'm skipping the middle man here and just using regular old salted butter. If you really like unsalted, or understand the mysterious behind buying unsalted and then putting salt in the recipe, well, it would be about 1/2 tsp of salt back in. But I don't see the point really.

Tuesday, January 24, 2012

Pie day!


This is very unseasonal of me. The grocer's had a sale of two bags for one (doesn't that sound more enticing than 50% off? Implies somehow that we are getting one over on the man!), so I bought two bags of granny smith apples. Then I had to do something with them as the kids are perversely not eating apples this week. Normally I love making pies: today not so much, but forced myself to get up and bake and despite my seething I got into it after a bit and it all turned out quite nicely. The key to making pie dough is Don't Overwork It! It makes it all tough and nasty. Making a ring of pastry around the edge of the piepan helps keep it from burning (burning's a bit of a theme with my oven). If you use butter it's more likely to burn a bit. This was made on a big cookie tray as it goes further and is easier somehow to cut up for lunches. Still have too many apples!

Pie dough: makes enough for one huge sheet pie or a regular pie and little jam pies after.Preheat oven to 350 degrees.

2 1/2 cups flour
4 tablespoons sugar
1 cup butter
4 tablespoons very cold water


Mix flour and sugar. Cut butter into chunks and pinch in with your fingers. Stop as soon as the butter is fully incorporated. Add in a touch of water and blend. Add a touch more if needed. You want it to just stick, if it's too wet it's a nightmare to roll out, ditto if it's too dry. I roll it out on a sheet of clingfilm and then dust with flour, then put cling film on top. For this pie roll out a huge rectangle, for a regular pie roll out rounds, and place on cookie sheet.

Apple filling

Combine about 7 thinly sliced (sliced, not chunks) Granny Smith apples with about 1/2 cup white sugar or a combination of white, brown and honey in a bowl. Add 1 teaspoon of cinnamon and a pinch of nutmeg and stir to combine. Put the apple mixture on the dough and roll out the top sheet of dough. Place that on top and trim. Poke a few holes with a fork (not sure if this is strictly necessary as apples might like a bit of steam, but puts you in the pie-making tradition). After about 30 minutes watch it carefully as some ovens (ahem) like to burn people's pies. Cool a few minutes before letting kids attack pie. We like ours with a thin piece of cheddar. If you make a regular sized pie use the leftover dough to make little round jam pies (they bake much more quickly and need longer to cool: boiling jam is not your tongue's friend!).

Tuesday, January 17, 2012

Best weekday breakfast for cold days


It's been a heck of a year and my appetite has returned in leaps and bounds. I tell myself that this breakfast might keep me going till lunch and keep me away from (in the winter) chocolate cookies at 10:00 am or (in the summer) Starbucks chocolate banana smoothies. Mixed results on that front as willpower has as least as much to do with it as a full tummy, but this is a gorgeous breakfast, and once I've made a batch it lasts at least a couple of weeks (eating it 6 mornings a week). This is a flexible recipe: feel free to change up the nuts and dried fruit, but the oatmeal + oil + sweetener ratio should stay the same

West Coast Granola with compote

3 cups uncooked oatmeal
1/2 cup oat bran (OR 1/2 cup flax meal OR 1/2 cup hemp seed OR both)
1 cup pecans (or walnuts or whatever nut you like)
1/2 cup pumpkin seeds
1/2 cup sunflower seeds
1/2 cup olive oil
1/4 cup water
2/3 cup maple syrup or agave syrup or brown rice syrup or honey or a combination
1 teaspoon vanilla
1 heaping teaspoon cinnamon (optional)
1 cup dried apples (or blueberries, cherries, cranberries etc)
1/2 cup dried barberries (available in Middle Eastern stores)

Mix together everything but the fruit and bake for 20 to 30 minutes (till it's pretty dry) at 250 degrees. Stir every 10 minutes or so to ensure even cooking and avoid burning. Remove and stir in fruit, store in an airtight container.

Fruit Compote
1 bag frozen berries (about 3 cups?): generally I use rhubarb, a little raspberry added in is nice too
a bit of of water
honey to taste (in the case of rhubarb you will need maybe 3 tablespoons).
Boil till the fruit is softened.

I tend to add about a couple of tablespoons of fruit compote as well as some nice plain yogurt (goat yogurt is very luxurious). The compote lasts a couple of weeks in a jar in the fridge, if I can it properly then of course it lasts longer. Mine does not tend to last at all as I eat it up!

Keeping us warm on a snowy day food


Oh my, look what it's doing out there. Snow! Real, Canadian-like snow. I was going to drive somewhere, but I guess I'm not so it must instead be time to do some cold-weather cooking. A nice sun-shiney cake and a bin full of homemade granola should do the trick.

This is adapted from Ottolenghi's Orange Polenta Cake but as I don't much like polenta in cakes I've reworked it and it is now Orange Blossom Cake. It is gorgeously damp and looks like the sun and tastes like Portugal (if Portugal were a cake).

for the batter:
just shy of 1 cup butter
just shy of 1 cup sugar
3 eggs, just beaten
zest of two oranges
2 teaspoons orange blossom water
2 1/2 cups ground almonds
1 cup flour
1 tsp baking powder

for the caramel topping
1/2 cup sugar
2 tbsp water
2 level tablespoons butter
2 oranges, very thinly sliced

Glaze
bit of marmalade

Lightly butter a cake tin and line with parchment paper (really you want to do this otherwise you will create a very sad mess due to the caramelising). Heat the oven to 325 degrees.

Grate the two oranges and set the zest aside. Slice a smidge off the bottom and top of the oranges so that there is no white showing. With a small and delicate knife carefully cut away the remaining white bits of the oranges. Now slice them very thinly indeed (not so thin they'll fall apart but not so thick they will feel chunky when you bite into them: thinnISH). Make sure there are no pits because when the cake is upended you will the oranges.

Now make the caramel. Put the sugar in a nice, heavy saucepan and add the water. Stir gently to incorporate the water and slowly bring to the boil. Be very careful with it as a) it rather likes to burn and b) it rather likes to burn you. When it gets to a lovely golden caramel colour remove it from the heat. Standing well back carefully add the butter. Stir and then pour all over the bottom of the pan and tilt to coat. Lay the oranges in the caramel.

The cake is very quick and easy. Cream the butter and sugar then add in our eggs. Now introduce the orange zest and orange blossom water. Finally add in the flour, ground almonds and baking powder. Mix till combined but don't overmix. Pour over the oranges taking care not to dislodge them. Bake for about 40 minutes, tenting if necessary.

Remove from the oven and leave to cool for 5 minutes. While the cake is still warm (otherwise the caramel sticks like glue) turn the cake out and let cool. Remove the paper, natch.

Glaze the cake with a mixture of 4 tablespoons warmed up marmalade and hot water (boil up in a saucepan).

Sunday, February 6, 2011

Shabbat Shalom!


Alright, it's not Shabbat, because if it was, well, I would not be on posting, right? But to get ready for next week, and for Clara, here's our challah. I am assuming most people's ovens do not try to burn things (ala our 1947 General Motors oven), but I do tent mine after ten minutes as I suspect the sugar in it and the glaze increase its tendency to go way too dark. So be forewarned it's a possibility. This is bread machine mixed, but if you don't have a bread machine, combine as usual, kneed 10 minutes, rise one hour, braid then rise two. Otherwise, follow directions below.

Challah

1 cup warm milk
3/4 cup sugar
1 tblsp salt
1/4 cup melted butter
2 eggs
4 1/4 cups white flour
3/4 ounce yeast (about one tablespoon)

Optional glaze
either brush a little milk over the top or an egg beaten with a teaspoon of water (you won't use the whole egg of course). Then sprinkle with sesame seeds or poppy seeds. Do this right before baking and be gentle so that you do not cause the bread to collapse.

Put ingredients in the order above into bread machine. Make sure milk is warm but not hot (hot kills yeast, cold does not allow it to rise). Beat the eggs with a fork before adding flour. Once everything's in, turn it on to dough setting. Once it's done, take out and braid: to do this separate the challah into three balls and then roll each ball into a long piece (like playing with playdough!) and braid as you would hair (Not sure mentioning hair in a recipe is very appealing ...). I put the challah on a buttered silpat mat to rest, you may also use parchment paper. At this point the challah needs to rise for at least 2 hours. We normally make the challah this way after dinner, put it in the fridge for a slow rise overnight and take it out when the cat wakes me up at 5 a.m. or so. Take it out as soon as you wake up if you lack a cat alarm clock. Bake at 350 for about 50 minutes. Check to see if it needs tenting with tin foil after 15 minutes: if it looks baked at that point then it's going to be black after 50! As with all bread it is done when it sounds hollow when tapped on the bottom. Let bread cool before either slicing or pulling apart (the braiding allows it to pull apart very nicely and is much more traditional than slicing: I've never actually witnessed slicing but I'm sure it must happen).

Sunday, October 3, 2010

Chocolate bananas in paradise


Ooooh. Totally in love with chocolate and bananas all mushed up into a bit of heaven: which conflicts horribly with my attempts to swear off chocolate! My camera's bitten the dust so at the moment I'm a bit short in the "photo of our favourite chocolate cake of the moment" photo, but maybe that can come later? I do have pictures though of our chocolate banana oatmeal cookies and our banana bread chocolate cake to stimulate you and get you softening butter. So read on and turn the oven on!

Banana Chocolate Chunk Oatmeal Cookies

In light of most schools being nut-free and it being back to school season, I've taken the nuts out of this equation. Feel free to pop them back in if circumstances allow (pecans or walnuts: personally I think it's overload with the nuts, but on the other hand it's added protein). Unlike some chocolate chip cookies, these stay moist and fresh-tasting all day. Gorgeous.


3/4 cup butter
1/2 cup brown sugar
1/2 cup white sugar
1 and 1/2 tsp vanilla
1 egg
1 large banana (or about half a cup)
1 cup white flour
1/2 cup whole wheat flour
1/2 tsp salt
1/2 tsp baking soda
1 cup rolled oats (the kind you cook for three minutes to make oatmeal)
chocolate chunks or chips to taste

You know the drill, right? Cream the butter and add the sugar. Blend the sugar, and add the egg and vanilla. Mush that together (spoon or mixer), then add the banana. Now it's getting really wet, right? Add in the dry ingredients (which you've mixed together beforehand, right?). When everything's blended add in the oatmeal then the chocolate. As much chocolate as can be reasonably accomodated in the cookies. Bake for about 12 minutes at 375. Mmmmm


Banana Bread with chocolate icing

for years I've been baking this as straight-up banana bread and then - did I mention I've got a problem with chocolate? - I thought, I'm going to ice this sucker and chocolate it up a bit! So make it as straight up banana bread (in which case you need to bake it for longer and, in the case of my loving oven, tent it against scorching) or put it in two pans and bake for 20 minutes or so, cool and ice. Either way it's the absolute best banana bread in the world. Seriously.

1/2 cup butter
1/2 cup sugar
2 eggs
1 1/2 cups white flour
1 tsp baking soda
1/2 tsp salt
1 tsp vanilla
1 cup mashed bananas (two big or about 3 small, should be a cup though)
1/2 cup yogurt (or sour cream or 1/3 cup keffir: I usually use plain no sugar no gelatin yogurt)

Cream the butter and add the sugar. Mix that til you're bored. Get it out of your system now, instead of at the flour stage: overmixing flour in anything but bread makes it tough and rubbery. So mix the butter-sugar well instead if you're that way inclined. Add eggs, mix well. Stir the dry ingredients together and add to the wet. Add banana-mush, yogurt and vanilla. Stir well. Pour into buttered and lightly sugared loaf pan or two cake pans (hmmm ... heart shaped pans would be nice). Bake about an hour for the loaf, 20 minutes for the pans.

Chocolate icing (for any cake at all).

1/2 cup butter (very soft)
3/4 cup sifted icing sugar (if you don't sift, you get lumps, see lumpy icing in the photo where I got all lazy and instantly regretted it)
1/4 cup cocoa (sifted, see above)

Stir up the butter till it's creamy add icing sugar and cocoa and mush it all up! Ice the cake (which you've let cool for half an hour at least: it tastes incredible slightly warm with the icing, on the other hand it's hard to ice a warm cake without the icing slithering down onto the cake plate). Enjoy!

Chocolate and banana pecan crumble cake (adapted from UK Country Living)

1 cup brown sugar
3/4 butter cup
1 cup good dark chocolate
2 small bananas
2 eggs
1 1/2 cups white flour
2 tsp baking powder
1/4 tsp salt

For the crumble topping
1/4 cup brown sugar
1/4 cup pecans, chopped
1/2 cup chocolate chips

Butter two cake pans. Melt the butter, chocolate, sugar together and then add the smushed bananas. Next add the eggs and stir the bananas in and mix well. Next fold in the dry ingredients. Pour half into the pan. Crazy-easy cake! Next, make the crumble: just chop nuts, mix with sugar and add in chocolate chips. Put half the crumble on top of the half the batter in the pan, then the rest of the batter, then the rest of the crumble. Pop it in the oven for about 40 minutes (or 20 if your stove is a maniacal 63 year old General Motors model like mine). Let cool about 15 before turning out (some of the crumble will fall off, pile it back on!).

Sunday, August 22, 2010

rose cake for the end of summer


School starts soon, and the evenings are feeling cooler. The province is on fire, but down here in the city it seems like summer's drawing to a close. I can't imagine making this cake anytime but summer, preferably in July with rose petals from my Ispahan bush in the back garden. You want rose petals with scent so commercial flowers won't do, and Old Roses are preferred. Perhaps some of you still have roses blooming, somewhere in the blogosphere?


Rose Petal Cake

3 eggs

1 cup of sugar

1 cup of butter, softened

1 tsp rose water

1 3/4 cups all-purpose flour

1 teaspoon baking soda

1 teaspoon baking powder

1 cup sour cream or yogurt

rose petals for the inside and top of cake

GLAZE:

1 tablespoons rose water

6 tablespoons lemon juice

1 1/2 cups icing sugar


Whipping cream for the middle of the cake

Preheat oven to 350 degrees. Grease and flour a 9 inch cake pan.

Beat the butter and sugar together until light. Add in the eggs and rose water.

Add half the flour mixture, and stir in. Add half the sour cream, a handful of rose petals and then add the rest of the flour and sour cream.

Pour the mixture into the cake pan and bake for 35-40 minutes or until a cake tester or toothpick inserted into the thickest part of the cake comes out clean. Cool in the pan for 10 minutes, then invert onto a cake rack.Once cooled, slice in two and lay one half on a plate.

Next, make the glaze. Sift the icing sugar into a small saucepan and put on low heat. Add the juice and whisk to break up any lumps.

Whip some whipping cream and put in the middle of the cake, then add the top half. While the cake is still warm, using a long skewer (or just a toothpick), poke holes all around the top of the cake. Drizzle the syrup over the cake. Sprinkle with some gorgeous rose petals and reserve some to serve with each slice.

Tuesday, August 10, 2010

It's all about the breakfast


Lately I've been trying to appease my sweet tooth and my desire to eat in a way that nourishes my body as well as tastebuds by at least starting the day with good intentions fulfilled. To that end I've been eating a lot of wholewheat toast with hemp seeds sprinkled on top and a half a banana sliced and smushed in. Sometimes for lunch too. And this generally works pretty well for me. The kids, however, get a little fed up with their toastly versions of this (marmite for him, peanut butter and homemade jam for her, dulce de leche for both) and so weekdays we sometimes have scones and Sundays are always pancakes. Which they never seem to tire of. Mostly we have buttermilk pancakes with - a small attempt to pretend they're healthy - a quarter of a cup of ground flax seed mixed in. Covered in berries and maple syrup of course, these are not punitive pancakes but happy Sunday ones!

Buttermilk Pancakes

1 3/4 cups flour
1/4 cup flax seed
2 teaspoons baking powder
1 teaspoon baking soda
2 tablespooons sugar
2 eggs
3 cups of buttermilk
2 tablespoons butter

Combine dry ingredients. Mix eggs with buttermilk and butter. Add to dry. Butter the griddle and spoon batter on. After it's stopped oozing you can add a wee bit more to make the pancakes higher if you like. We like ours singly and large and sometimes in the shape of cat or bear heads. Once bubbles form it's a good time to flip the pancakes. Be confident and flip all of a sudden. Pancakes not taken by surprise sometimes don't flip as well. Cook on the reverse side for about one minute.

things which are nice on top of pancakes:
Maple syrup
lemon juice and icing sugar
toasted and chopped pecans
peaches, raw sliced or fried in a bit of butter and cinnamon
bananas (love maple syrup!)
granola (the crunch is a nice surprise in a pancake)
berries, lots of berries, fresh or compote

Sunday, August 8, 2010

Useful toil and the ready snap


Max and I had a fabulous BC Day. We ate pancakes (grilled peaches in butter and cinnamon on top, mmmmm), made pickles (spicy garlic dill cucumbers and another jar of pickled dragon's tongue beans: I haven't made pickles for years and it's made me feel gloriously in charge of my destiny. Canning has that effect on me - a sort of putting one over on the man combined with pleasure at having what may pass as a skill), Max continued on his amazing Lego Star Wars restaurant board, went to St Anne's to listen to music (which may have been quite good: turns out Max has the same appreciation for listening to bands that he has for shopping for ladies' shoes). There was a great deal of tsking and sighing and a low sort of moaning noise such as a very sad cow might make coming from my darling boy till I gave up and took him to the Inner Harbour so he could indulge his strange passion for looking at Weird Stuff We Sell to Tourists.

Then we came home and had quite wonderful dinner of grilled peppers pureed with feta cheese on pasta followed by homemade oat bars (he got to help pick out the dried fruit and was pretty excited about them). Just my kind of day (bar the part where we can't chill out and listen to music because " the older lady dancing is scaring me")!

Thursday, July 8, 2010

wood blocks, lino engraving etc

I cannot underestimate how much I love etchings. Not sure what is that does it for me, the simplicity of line perhaps? The kids and I had a birthday dinner last year for me in a Japanese restaurant and we were all three transfixed by the woodcuts. There's some pretty sweet British work out there right now, often with a nostalgic bent to it. Check out Emily Sutton www.stjudeprints.co.uk/collections/emily-sutton and Angie Lewin www.angielewin.co.uk/gallery.htm#gallery Doesn't that just make you sing?

Monday, July 5, 2010

Rats! Foiled again

After starting this I lost touch with the whole blogging notion for quite some time (no idea why: what on earth was I doing?). By the time I got back to it blogspot had lost the memory of my account being linked to it, or in a moment of madness I created a special account, or something, but at any rate I no longer had access to sugarwitch the original. And being in a dogmatic frame of mind and not wishing to rename the blog we now arrive at sugarwitch2. Let's see if I can actually keep this one up!